
Subscribe to continue reading
Subscribe to get access to the rest of this post and other subscriber-only content.
Subscribe to get access to the rest of this post and other subscriber-only content.

It’s a rainy Sunday on the Homestead and I am catching up on indoor activities and getting ready for the coming week. Meal planning and prep is a big part of staying within our budget and not allowing food to go to waste. Especially now. The apocalypse we planned for but hoped would never happen, is here. It comes in the form of a global pandemic that has its hands around our throats. With so many out of work (myself included) and resources running low, we are all watching our pennies.
Part of our weekly rituals is making a dozen “boiled eggs.” Eggs are high in protein and have enough fat to help keep hunger at bay. They are a quick snack and paired with some fruit can sit in for a full meal in a pinch. This past week eggs were 38 cents a dozen. That’s 3 cents each! WOW! That’s a bargain.
I have cooked eggs about every way you can think of to make sure they are easy to peel and finally settled on the Instant Pot after someone told me how easy it is. Even farm fresh eggs peel perfectly every time. And, you can take eggs straight from the fridge and not worry about them cracking. How cool is that?! You can cook as many eggs as will fit in the Instant Pot. I have cooked as many as 3 dozen at a time.
So, I thought I would take a quick break from cleaning and meal prep to share just how easy it is.
It is as easy as 5-5-7-5
Place 1 cup of cold water in the Instant Pot and place the rack inside. Place a dozen eggs onto the rack, and close unit. Set the Instant Pot to high pressure manual for 5 minutes.
It will take about 5 minutes to come up to pressure.
The eggs cook under pressure for 5 minutes.
Allow the pressure to naturally release for 7 minutes.
Release the rest of the pressure. Remove the eggs one by one, placing them in an ice/water bath.
Let cool in the ice/water bath for 5 minutes.
22 minutes to perfectly cooked eggs!
If you are thinking…GROSS, don’t write them off yet. If you already love greens, this is the time to ensure you have as much as your heart’s content.

The Hubster has never been big on greens unless you consider iceberg lettuce and then he would tolerate it if I covered it in creamy salad dressing. But that was before we grew our greens and he could tell the difference between, limp, day or week-old grocery store lettuce and a fresh leaf pulled from the garden and put right onto his sandwich. Amazing! So, if you have had a lackluster relationship with greens, give them another chance and commit to trying them in some new and unusual ways.
The science shows that eating a diet rich in leafy greens can reduce obesity and prevent heart disease. They can be rich in lutein, beta-carotene, Vit K, Vit C, Vit A, and B9, in addition to others. Even calcium! Collards can promote healthy bones.
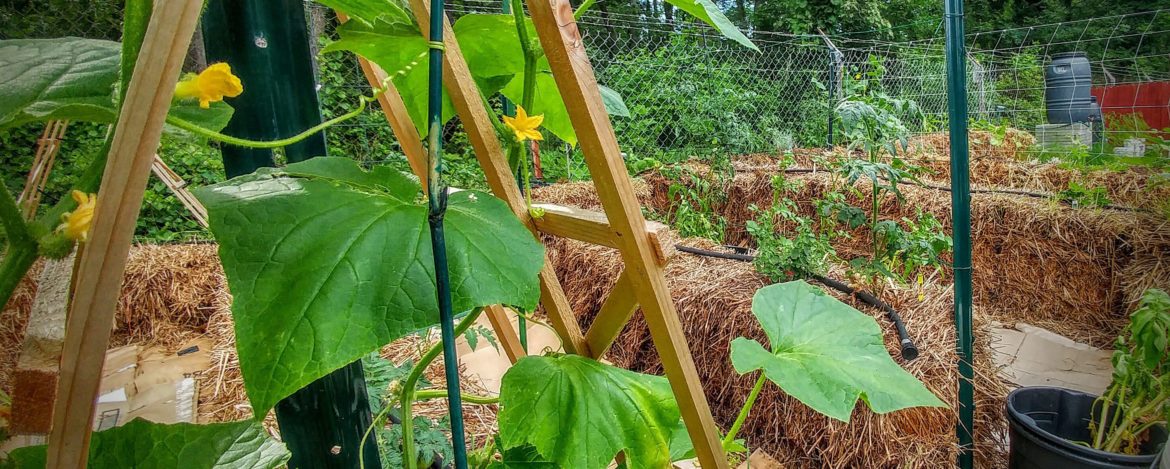
2020 has been a rollercoaster year. I’m not sure what else 2020 has in store for us but, we have been handed a big pile of figure-it-out when it comes to jobs, resources, and everything else we need to live. Obstacles include access to affordable vegetables for most people. We have grown a substantial portion of our food for many years but have ramped up our efforts so we may accommodate our family as well. The truth is that as the contents of our wallets shrink, we have to figure out a way to provide good, healthy food still. The good news is that even if you only have a sunny stoop or a small patch of dirt, you can grow greens quickly. Add a few inputs and a grow light, and you can grow them on your kitchen counter. With a single packet of seeds, you can raise a season’s worth of greens for your entire family.
When times are good, I prefer to order my seeds from Baker Creek Seeds, and when they are lean, I pick them up on the cheap at the dollar store. Though I aim to grow organic, I’m not a purist in the sense that it is more important to feed my family than to risk going hungry if I can’t afford the expensive heirloom seeds I prefer. It is also why I save seeds from year to year but that is another post.
We are in the inconsistent Virginia zone 8a. It’s fabulous that most greens do well here once the heat of summer has abated. September is the perfect time to direct seed or start more transplants under lights. We started the first direct-seeded greens last month and have been harvesting leaves as we need them. Today, the rain drove me inside, so I took the opportunity to start several flats of greens. Spinach, Collards, and Lettuce are on the menu! I chose these to do in bulk because they are all yearly winners, and most of my family loves them. The plan is to eat as much as we can fresh and preserve the rest.
Lettuce (Black Seeded Simpson)
Black Seeded Simpson is a super easy first lettuce to grow! It can be grown in a pot on your doorstep, in a raised bed, in the garden, or even in the flowerbed of an area of dapple shade. It has a loose-leaf habit that makes it nice for sandwiches or salads. It can be planted over and over through the year (except for the warm months). Did I mention it grows FAST! So you start eating quickly. The seeds are tiny, and you only need 3 per cell if you are starting them indoors. A package goes a long way. Once they emerge, you will be thinning them to 8″ apart anyway. Pop those tiny seeds in the soil 1/8″ deep and keep moist. The plants fully mature in about 45 days, but you can start harvesting earlier.
Collards (Creole)
I love collards. I could eat them every day. My favorite is when they are cooked way down and have a little vinegar drizzled on them. Yum. However you like to eat them, they pack a nutritional punch. Remember the Calcium? They also are rich in folate and Vit K (heralded for its effect on blood clotting). They tend to be a bit bitter, and some prefer them after a frost or freezing weather hits them.
These are also well-suited to containers or the garden. It takes them about twice as long to get to maturity as lettuce, but the plants will be huge if you are not picking and eating them along. The tiny round seeds are to be planted 1/2′ deep in the soil. When transplanting them outside, give them plenty of space to grow, 2-3ft is best, or a BIG pot. I like the 28-gallon plastic pots that landscapers get trees in. Ask around, and they will probably give them to you. It is hard to recycle them these days, and they won’t have to take up precious space in their dumpster. In about 70 days, you will have fully mature plants that will weather the winter and provide greens until the heat of summer makes them bolt.
Spinach (Giant Noble)
This spinach packet is one I picked up for 99 cents. Spinach is accredited for giving Popeye his super strength and for good reason. It is packed with vitamins. It is also versatile for cooking as it can be incorporated into soups, hot dishes, smoothies, or even pizza. It freezes, freeze-dries, dehydrates, and cans well so it is a superstar of preservation if you are trying to build up your prepper pantry. it will produce all through the winter and you can start harvesting leaves as soon as it has 10-12 leaves. Just pinch them off.
Sow it 1/2″ in the soil. Final spacing should be 1-2 ft if you will be letting it grow to maturity at 45 days. You can space them tighter if you are a fan of baby spinach and eat them young. You can get several waves of plantings each year.
All of these only need about an inch of water per week. To be honest, I rarely supplement natural rain. If we have a severe drought, I will drip irrigate, but I tend to let plants get a bit dry and “work” for there dinner. That way, they get stronger and put down strong roots that will carry them through. We are in the coastal zone 8a; you will have to adjust your watering based on your unique climate tendencies.
Soil
I’m not fussy about soil. It needs to be as organic as possible, meet the needs of the plants, and not cost a lot. We rotate 15 composters and use mulches, spent composted straw, and worm castings (we raise our own). If the nutrients need to be adjusted, I lean toward powdered eggshells for calcium, bloodmeal, or composted manure for nitrogen, and leaf mold. Since we compost, we are always collecting anything that can be layered into the bins or put into the tumblers. Three are designated organic, but the other 12 are regularly filled with shredded magazines and cardboard when brown material isn’t available. Go ahead and drag home as many of those bagged leaves your neighbor just put by the curb!
The Math
Fresh veggies cost a lot to transport, store, and sell fresh. Add to that the massive safety recalls we have seen in recent years, and you certainly can see how just replacing part of your diet with homegrown veggies can lead to big savings. A package of baby spinach hoes for about $5 here, a bag of lettuce $3, and a bag of chopped kale is $4. It starts to add up even if you only have a single serving a day. When you grow your own, you know it is clean. And you don’t buy a bag only to have it go bad in the fridge because you didn’t eat it fast enough. You step outside your door and pick what you need. If you have a daily salad and grow the veggies, you could easily save $2 a day. That is $730 a year from planting a few seeds and letting the earth do what it does. I used to think, “What could I do with $730?” During the 2020 pandemic, I’m more likely to be thankful I can cut expenses because we don’t have the money to buy salads.
I’m counting on coming into my next big outdoor greens harvest will begin around Thanksgiving. It is only the beginning of our fall garden, and our hedge against the financial arrows 2020 has shot at us.

We are still on a mandatory “Stay at Home” order from the Governor of Virginia. Executive Order 55 has us sheltering until June 10th. Well, we were pretty well taken care of but certainly concerned about provisions. When you homestead, you are already trying to make great use of resources and reduce waste. We normally grow our sprouted garlic that we cannot eat right away. Really, any veggie, such as potatoes, garlic, or onions can be potted up in dirt and grown. Our big summer harvests get freeze dried or dehydrated.
We had a bunch of these little plastic salad dressing and condiment cups with lids and decided to cut them with a Styrofoam Hot Wire Tool. We made a 3/4 inch hole in the lid.

The sprouted clove sits happily out of the water with the roots dangling below; the lid also keeps water from evaporating too quickly. Every week, the water in the cup should be changed. And…if you need garlic for a dish, just use it, green tops, too!


I have several in my east-facing kitchen window. If you look closely, you can see the clove is starting to bulb and divide. Pretty amazing. For everyone out there homeschooling, this would make a neat Science project (growing it), History lesson (where does it come from?), and Home Economics (cook with it).
This is just a tiny piece of our “Victory Garden” effort. Please check out our new YouTube videos. Happy gardening!


Most of us have been caught off-guard by an unexpected bill or expense. Unless it breaks the budget, we might not even notice that our budget has a bleed, or that we are spending money on things that don’t make our lives better. Sometimes, we are spending money on things that don’t matter at all.
Plugging up the leaks early can give you more of a cushion to play with. So, what can I do today?
Plugging a $10 bleed each week adds up to $5,200 over a ten year period, before you account for interest. That’s the price of a used car, or a roof, or an HVAC system. Wow!
What other ways do you plug the money bleeds? How much of a difference did it make?

Walking through the garden, we find tomatoes on the ground from recent windy days. Sometimes, we just can’t wait for the warm air to turn them from green to scarlet orange and we pick a few from the vine to enjoy.
Today marked the first Green Tomato Pie of the season. Each pie is made from a base that doesn’t change much. Sugar, flour, cinnamon, nutmeg, cloves, and salt make up the basic recipe, to which we add green tomatoes and assorted fruits. The pies change according to what is available in the garden and kitchen. Depending on time, the pie shell is Graham cracker crust or traditional pie crust…or, if I am really strapped for time, they take the form of a cobbler and are baked in a Pyrex dish.

The basic recipe:
Plus, the fruit…
Simply mix the flour, sugar, cinnamon, nutmeg, cloves, and salt in a medium bowl. Mixing before combining with fruit prevents clumping of the spices and ensures even distribution and a balanced taste.
Dice the green tomatoes (and fruit) and add 2 tablespoons of apple cider vinegar to the fruit.
Mix fruit together with the base mix to coat evenly.
Pour into a pie shell.
Bake at 350 degrees for 30 to 38 minutes until mixture bubbles.
Cool thoroughly and refrigerate leftovers.
Serve warm or cold with sweet cream or ice cream.
Dress it up with nasturtiums or violets.

Kombucha is the centuries-old beverage made by fermenting sweet (green, black, white, or oolong) tea. The ferment develops a SCOBY (symbiotic culture of bacteria and yeasts) pellicle and liquid. As sugar is consumed by the ferment, it forms a lovely balance of acids. Acetic acid, lactic acid, malic acid, butyric acid, and more mingle together to give kombucha it’s refreshing tart taste. Juices and fruits are added after the initial fermentation to impart flavor and feed the yeasts to provide a gentle fizz. The final beverage is packed with vitamins and enzymes believed by many to provide a wide array of health benefits, including supporting gut health.
There is yet to be a large body of controlled research to definitively put a stamp on the benefits attributed to kombucha. The US National Library of Medicine, National Institutes of Health has several studies and published articles of interest including https://www.ncbi.nlm.nih.gov/pubmed/24290641 . The strongest connection is that probiotics may improve gut health. https://www.ncbi.nlm.nih.gov/pubmed/26960543 addresses the suitability of fermented foods as a source of probiotics. https://www.ncbi.nlm.nih.gov/pubmed/30197628 discusses enhanced shelf-life and nutritional properties of fermented foods. Https://www.ncbi.nlm.nih.gov/pubmed/28115036 eve refers to low/no alcohol fermented beverages as a food group. Other fermented foods such as Tempeh, yogurt, kefir, sauerkraut, kimchi, miso, and pickles would fall into this group of potentially health-boosting, probiotic-rich powerhouses.
The kombucha market was fairly limited in the US when it hit a rather large speedbump in 2010 over a crisis of regulation. Fluctuation in alcohol contents that deviated from the allowed .5% maximum led to halting sales. This opening on the shelves gave smaller brewers the opportunity to enter more markets and expose Americans to more variety in commercially produced kombucha beverages. This shake-up in the commercial market set off a cascade and resurgence of the beverage popularity.
The US market for kombucha is 180 million US dollars, with 95% in organic products. According to www.statista.com the market is poised to top 1 billion by 2023.
“US retail sales surged 37.4% in 2017,” while the rest of the non-alcoholic beverage market grew a skimpy 1.2%, according to www.foodnavigator-usa.com
Huge sales are just a part of the picture. Homebrewing which has been popular since the 70’s has grown at a rapid rate. While some would claim that home-brewed kombucha is dangerous, others brew it by the gallons and claim it has cured everything from the common cold to cancer. There isn’t much evidence of either other, but that hasn’t stopped the growth or the public support of kombucha. Green tea, cane sugar, filtered water, some starter (kombucha from a previous batch), and time. It is inexpensive to make, delicious, and potentially part of a healthy diet.
I am a long-time kombucha brewer and drinker. Each person has to decide what is right for themselves and their family. I love the taste and how it makes me feel. We strive to limit the unknown ingredients in our food and like to control the process. At the same time, we are trying to live a fiscally responsible life and develop skills that have the potential to be lost and share those skills. I will share with you how I make my kombucha and some resources where you can research and find more information on brewing your own, should you decide to pursue fermenting at home. Stay tuned for the next article in the series. I will be sharing step-by-step instructions for making kombucha from a starter or from scratch. Enjoy!
*We are not claiming any health benefits of kombucha. We are just sharing the facts we have found and our own experiences consuming and brewing fermented beverages. You assume all risk should you choose to brew and consume kombucha.

Tree Tapping Season in Southeastern Virginia
Most maple syrup produced in the United States comes from Vermont, but that doesn’t mean we are shut out from the practice of sugaring. Virginia’s below-freezing nights combined with the mild above freezing days of late-winter can mean a short but prolific running of the sap. At 36° latitude, Virginia is on the lower edge of maple sugaring country. It is unique to the area above 35° latitude and east of 95° longitude.
Native Americans have been harvesting the sap and boiling it down since before the Pilgrims arrived. Maple syrup has been reported to have been on the menu of the first Thanksgiving in 1621.
Maple syrup was even a patriotic, politically-correct, sugar-alternative leading up to and during the Civil War, as traditional sugar used southern, slave labor.
Sugars are near-perfect foods in that they store well for very long periods of time and have a high caloric content needed in times of survival.
Maple syrup is commonly used to top pancakes and waffles but may also be used to sweeten drinks like lemonade and tea, lend sweetness to marinades for meats, flavor candies, muffins, cakes, frosting, and oatmeal. Plus, it makes a nice gift.
Add to the utilitarian uses the medicinal properties of maple syrup and I find even more reasons to harvest, process, and store it in our pantry. The maple sap has many vitamins, minerals, and antioxidants. It may have anti-inflammatory properties, has a lower glycemic score than regular sugar, and is a component of many popular cleanse diets.
Maple season is wrapping up for me. This year was super fast and furious. It started quickly, flowed fast, and then as fast as it appeared, the season ended. We tap Red Maples, but you can also tap Sugar Maples, Silver Maples, or Black Maples ( as well as many other trees).
To find out if you have trees suitable for tapping, identify the trees you have on your property and map them. https://pubs.ext.vt.edu/content/dam/pubs_ext_vt_edu/388/388-802/388-802_pdf.pdf The 4-H Forestry program has some valuable information for learners of all ages.

You will need to identify mature, healthy trees at least 12” in diameter.
You only need some simple supplies to tap trees: drill and drill bit 9sized for spile), spiles, tubing, cheesecloth or fabric, hammer or mallet, and buckets, bags, or jugs to collect sap.
I found inexpensive kits on Amazon as well as Tap My Trees www.tapmytree.com/shop www.tapmytrees.com/product/beginning-tubing-kit/ , Lehman’s www.lehmans.com/category/sugaring-supplies Merchants from Walmart to Tractor Supply sell sugaring supplies and kits. Order supplies well ahead of time so that when conditions are right, you can tap right away.


You will need to check your area’s expected tapping date with the Local Extension Office, but the sap flows between late January and early March in Virginia. When the night’s temperatures are below freezing and the day’s temperatures are above freezing, the expansion and contraction squeeze the sap up through the tree. The wider the swings, the faster it flows. The season may last as long as six weeks for us. This year, it only lasted for three weeks. We tap each tree twice if possible. Trees12-18” can support a single tap, those 18-25” can support two taps, while those 32’ or more in diameter may support as many as six taps.
Start with clean equipment. Use a very sharp drill bit and good quality drill so that you may make a single hole 1 ½ inches deep, at a very slight upward angle, in one single pass. Resist the urge to drill back and forth as it may seal the hole. If there are wood bits at the edge of the hole, use a toothpick to sweep them out and promptly tap in the spile. The shavings of a healthy tree will be very light brown. If the shavings are dark brown, choose another tree. Do not tap within six inches of another hole or the hole from a recent year. You should see tree water or sap dripping. I prefer to use food-grade tubing attached to cleaned-out plastic milk jugs, rather than buckets or bags. The tubing resists debris getting into the sap and saves time filtering the sap.
I check the jugs every morning and every evening, emptying and filtering through cheesecloth or fabric, then refrigerating or freezing the yield until I am ready to cook it down. When the sap is flowing well, I will get a gallon a day from a tree. At times the flow may slow to a trickle. The sap will continue to flow until temperatures stabilize and remain above freezing day/night, and the tree buds. At that time the sap will get a bit cloudy and take on a bitter taste. Remove the taps from the trees with a pair of pliers, and all equipment should be cleaned and sanitized and stored for the following year. The tree will heal and be ready for tapping again next season.
It takes about 40 parts sap to make 1 part syrup. Boiled sap (which is not reduced down to syrup) may also be used full strength as a drink or “light” sweetener. Five gallons boils down to about one pint of finished syrup. A few years ago, we ended up with 191 ounces of finished syrup and had a nice assortment of holiday gifts to share. We also made rock candy that year.
Our freezer is full of the wonderful sweet water/sap from the Red Maples that my grandmother planted. We are the fourth generation to live in our home and are blessed to have the legacy of our ancestors to help us subsist. In the coming weeks, I will find a nice day to sit outside and cook the syrup while I crochet or read a good book or two. Check back, and I will be sharing the cooking process in a future post. Until then, start scouting your trees and planning next year’s tapping adventure.


5 pounds of apples, peeled, cored, and cut into chunks
4 ½ cups white sugar
3 tablespoons apple cider vinegar
2 ½ teaspoons ground cinnamon
¼ teaspoon ground cloves
½ teaspoon Himalayan sea salt
1 pinch ground cardamom
Place all ingredients in slow cooker.
Cook, covered, on high for 3 hours.
Reduce temperature setting to low and cook for 12-14 hours until dark brown.
At this step, an immersion blender can be used to make the apple butter super-smooth.
Uncover and cook for 1-3 hours to thicken.
Spoon into clean jars and process in waterbath canner (15 minutes for pints) or store in the refrigerator.

Imagine gallons of healthful apple cider vinegar…for free. It is easier than you think. Follow the easy, step-by-step instructions to turn waste into liquid gold.
If at all possible, start with organically grown apples. The redder the skin, the darker the finished vinegar will be. Any apples can be used. If you have an abundance of apples, the entire apple can be used. It is more efficient to make your apple cider vinegar when you are also processing apples for other recipes, such as applesauce, apple pie filling, apple juice or apple butter. The skins and cores which are left over from the recipes may be used instead of simply being discarded or tossed on the compost pile.
What you will need:
A large glass jar (1 or 2-gallon size works well)
Peels and cores from 5 pounds of apples
2 tablespoons of sugar
Water
Place bowl of apple peels and cores on the counter to rest and brown for 24-72 hours. You want them to turn brown, so let Mother Nature do her work on them.

Once brown, place the peels and cores in a large, wide-mouthed jar.
Sprinkle 2 tablespoons of sugar over the peels and cores.
Pour enough room-temperature water over the apples to cover the peels and cores.

Cover with a piece of fabric or cheesecloth tied off with a string or ribbon.

Store in a warm, dark place for one month.
A mother will form on top of the mixture. It will resemble a jellyfish and is desirable. DO NOT THROW THE MOTHER AWAY!
Scoop out the mother and set aside in a bowl.

Strain apple pieces out of the liquid.
Return liquid to the large jar. If you do 2 batches at once, they can be combined at this time.

Replace mother on top of the liquid.

Re-cover jar with fabric and set aside for an additional 2-6 months until finished
.Finished apple cider vinegar may be stored in the refrigerator to keep it fresh.
5 pounds of apples, peeled, cored, and cut into chunks
4 ½ cups white sugar
3 tablespoons apple cider vinegar
2 ½ teaspoons ground cinnamon
¼ teaspoon ground cloves
½ teaspoon Himalayan sea salt
1 pinch ground cardamom
Place all ingredients in slow cooker.
Cook, covered, on high for 3 hours.
Reduce temperature setting to low and cook for 12-14 hours until dark brown.
At this step, an immersion blender can be used to make the apple butter super-smooth.
Uncover and cook for 1-3 hours to thicken.
Spoon into clean jars and process in waterbath canner (15 minutes for pints) or store in the refrigerator.